-
So that asshole industries can write their name on it again and the thing is then sold hundreds of times overpriced on Ebay?
No - they'll have to do the work of brushing it off again.
The whole thing will be available at Bobbel in the restore store for a small price.
First post said gerbers and bom will become available at github.
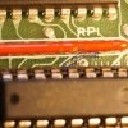
I'm making my own motherboard based on 250466. I have a stripped faulty mothernoard ready for scanning. Using ready made gerbers instead of a scanned image would help.
There's plenty of changes so my version will not be a 100% 466 clone. Dual sid, esd protection etc.
-
Are the gerbers yet available?
-
It is hard gold. One clue is the small track going from the pad to chamfered edge. For hard gold all the plated areas need to be connected electrically. Rest of the board is ENIG. IIRC PCBway can even combine HASL with ENIG or hard gold edge fingers by some masking process.
-
PCBway can make hard gold edge fingers. It adds about 200€ extra per order. With large enough order it doesn't make much per PCB.
I once ordered a group buy of KungFu Flash PCB with chamfering and hard gold.

-
-
The speed rating is correct. I sell them at Amibay and Lemon64 with the same username. I could try a code change and send you a free sample to test.
-
Interesting. First time I hear about compatibility issues with neatPLA. Where did you get the chip? What is the speed code of the CPLD chip?
-
"Brake cleaner" spray works great for removing flux residue
-
Blu-Tack doesn't tolerate heat. It becomes too soft. Potato is fine. At my previous workplace I had access to a PCB mill and made some soldering jigs out of very thick PCB. The holes don't go all the way through.
-
About SCART and s-video/RGB. I have noticed most TVs with two SCART connectors got RGB support on one and s-video support on the other connector. Some TVs with one connector got a choice in settings menu for s-video/RGB.
-
Needed to change a small 56 ball CSP chip. Used my old trick where I make a placement jig of SMD resistors and heat cured epoxy. Then it's easy to remove old chip, wick off old solder, add some flux and drop in a new chip. Soldering with hot air. Epoxy and resistors can be easily removed with tweezers before cleaning the PCB.
[attach = '277957', 'none', 'true'] [/ attach]
wich kind of epoxy dit you use? and how to solder the new chip? The step between picture two and three: nixwiss:
The epoxy is called "SMT glue" or "heat-curing SMD glue". There are many brands. Most places like Digikey, TME etc. sell it.
Explanation of images: First image got the SMD resistors and uncured epoxy placed. They will work as a placement jig.
Second image: the PCB was heated with hot air. The epoxy cured and the broken IC was removed. Old tin was cleaned with solder wick.
Third image: flux and the new IC was placed onto the PCB.
Fourth image: New chip was soldered with hot air. Epoxy and resistors were removed with tweezers. PCB was cleaned with IPA.
-
Assembled first neatKERNAL prototype.
Software ROM in MCU. You can easily change kernal, basic and character roms. Prg and .d64 loader etc.
Automatic detection of long and short motherboard. Need to remove holes from under white text for the next version. Now the text is fuzzy.

-
Needed to change a small 56 ball CSP chip. Used my old trick where I make a placement jig of SMD resistors and heat cured epoxy. Then it's easy to remove old chip, wick off old solder, add some flux and drop in a new chip. Soldering with hot air. Epoxy and resistors can be easily removed with tweezers before cleaning the PCB.

-
Last order from JLCPCB had the same price 1, 2 and 4-layer boards. 1.69 € for 5pcs. 28pin DIL sized boards. I ordered my first 4-layer boards.
-
Ordered Elegoo Jupiter. It has larger print volume than Ender 3. Atm. I have an Elegoo Saturn.
With 50cm z-axis modification it's large enough to print C64 cases 

-
One quite good EDA tool is CircuitStudio. About 400€ for a licence (same range as DipTrace standard). 150€ annual update fee which I haven't paid. It's quite close to full Altium Designer so layout engine is very good.
There are rumours CircuitStudio will be replaced with CircuitMaker Pro.
CircuitMaker current version is also quite good. The library is a mess though. It's free but you can only have 2 private projects. Other projects need to be shared. But sharing is the idea anyway with this free EDA tool.
-
Ordered case front panels made of PCB. I have several DPS modules. I used to mill the panels with a PCB router but I haven't got access to the router anymore.
I will share the design at GitHub. With and without power button.


-
Biggest advantage of modern replacements is way lower power consumption. The CPLD versions consume only about 25mA.
-
DodgyPLA and XCPLA are basically the same. It is more interesting to distinguish how they are programmed in each case.
You could also test NeatPLA, which is based on Dodgy, but has changed some timings: https://github.com/1c3d1v3r/neatPLA
I also have one here that I would borrow to test.
I made the neatPLA. The same timing fixes are also available for dodgyPLA and XCPLA. If you got the tools you can udate the code.
neatPLA got different layout so pins were mapped differently. Also the LDO is 3.6V instead of 3.3V.
-
That's the old version no longer for sale. Haven't yet made a sales post for the new version. Price is the same.
Here's the link for the assembly instructions.
If you want new neatSRAM just PM here or at Lemon64.
https://urly.fi/28Eo